Signatures allow to you to create a small file that is
attached to each email you send out with your information or
whatever information you choose.
To Create a New Signature:
- On the main menu bar, go to Tools > Options
- Click the Mail Format tab
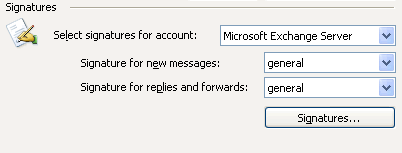
- Click Signatures ... button
Figure 1
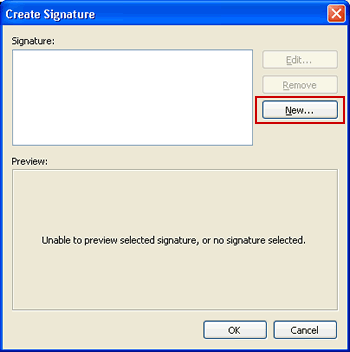
- The Create Signature dialog box will appear. Click
New...
Figure 2
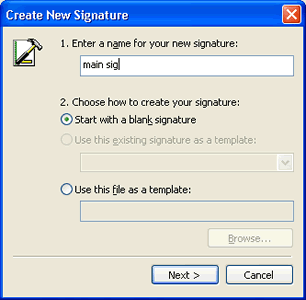
- The Create New Signature dialog box will appear. In
the text box, type a name for the new signature and
select the radio button next to Start
with a blank signature. Click Next >.
Figure 3
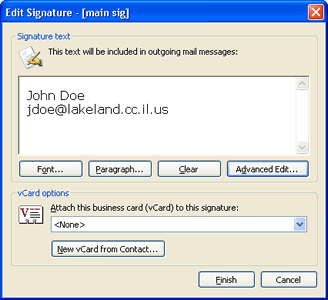
- The Edit Signature dialog box will appear. Type your
information in the text box. The text can be formatting
by clicking the Font...,
Paragraph..., and Advanced Edit...
buttons (This option will open Word). Choose
Clear to clear out information in the textbox.
Click Finish when done.
Figure 4
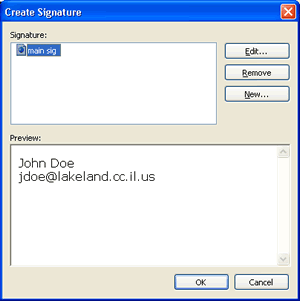
- The newly created Signature will appear in
Signatures dialog box with Preview box underneath. Click
the Edit..., Remove...
or New... buttons to edit, remove or
create new signatures. Click OK when
done.
Figure 5
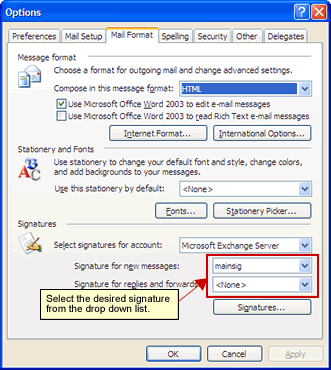
- The Options dialog box will reappear. In the drop
down menus, choose the desired signatures for new and
replies and forward messages. Click OK
when finished.
Figure 6
Back | Top | |