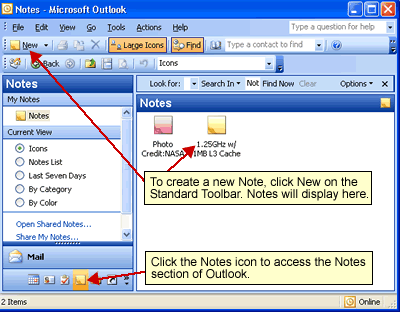
The Notes section of Outlook is a nifty little feature
that allows you to create small notes to yourself. To access
the Notes area in Outlook, click on the Notes icon in
Navigational Pane.
Figure 1
 + +
Creating a New Note
- Click New on the Standard Toolbar.
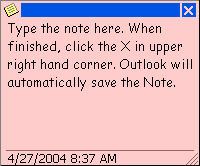
- A new blank note will display. Type the note
- When finished, click the X in the upper right hand
corner of the Note to save it.
Figure 2
Categorizing Notes
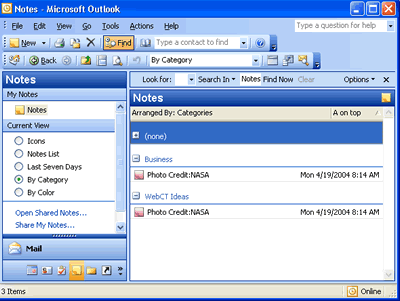
- Notes can be displayed by category thereby making it
easier to search through Notes.
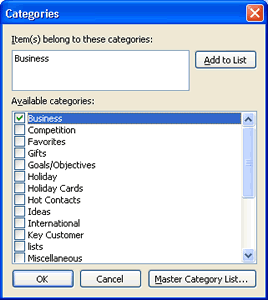
- To add a category to a note, right click over the
note and choose Categories... from the
shortcut menu.
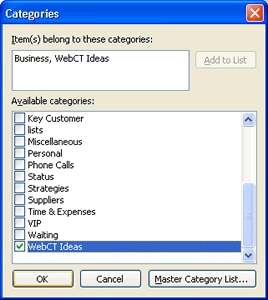
- The Categories dialog box will appear. Put
checkmarks next to the desired categories for the Note.
Figure 3
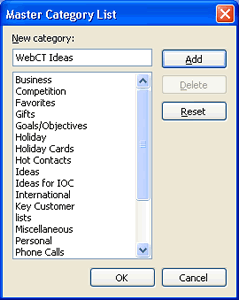
- If none of the Categories fit for the Note, click
Master Category List... in the
Categories dialog box.
- The Master Category List dialog box will appear.
Under New category:, type the
name of the new category you wish to add and click Add.
Repeat if desired to more categories.
- When finished, click OK.
Figure 4
- The Categories dialog box will redisplay. Select the
checkmark next to the newly created category to add the
category to the Note.
- Click OK when done.
Figure 5
- When viewed By Category, Outlook will place a copy
of the Note in both Categories.
Figure 6
Back| Top | |