The Distribution List feature in Outlook allows you
create a list of people from personal Contacts or GAL
(Global Address List). This comes in handy when you need to
send emails or send meeting requests to a large group.
Note: If you
previously used Eudora and are switching to Outlook, your
lists from Eudora will not
convert properly. You will need to create a New Distribution
List for each list you had in Eudora.
To create a new Distribution List:
- Click on the Contacts button on the left Navigation
Pane. On the menu bar go to Actions > New
Distribution List.
Figure 1

- A new Distribution List dialog box will appear. Type
a name for list in the text box next
Name:.
Figure 2
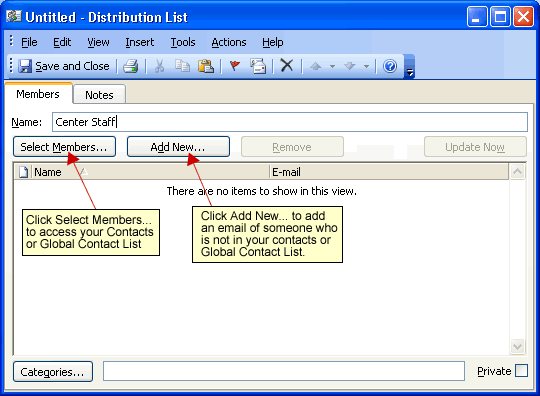
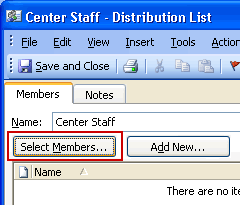
- Click the Select Members... button
to add contacts from your personal contacts folder or
the GAL (Global Address List).
Figure 3
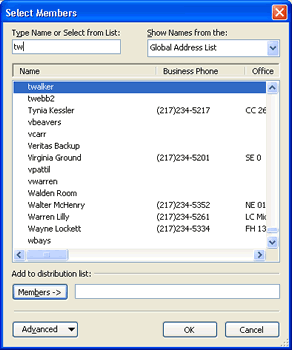
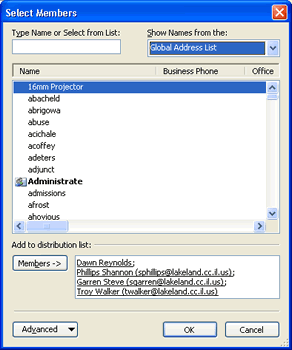
- The Select Members dialog box will appear. Type the
first few letters of the person's name you wish to add
in the text box under Type Name or
Select from List:.
- The list will display the person's name in the list.
Select the desired name and click Members ->
button. Repeat until you have added all desired people
to your list.
Note: The
list defaults to the Global Address List. Click the drop
down menu under Show Names from the:
to access your personal Contacts Folder.
Figure 4
- When finished adding people from the Global and
personal Contacts folder, click OK.
Figure 6
- Other people can be added who are not in your
personal Contacts folder or the GAL (Global Address
List). Clicking Add New Member... .
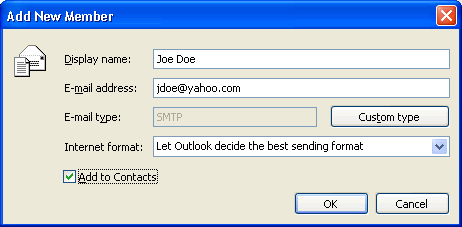
- The Add New Member dialog box will appear. Fill the
person's information in the text boxes next to
Display name: and
E-mail address:. If desired,
click the checkbox next to Add to
Contacts. This will add the new person as a new
Contact in your personal Contacts Folder.
- Click OK when finished.
Figure 7
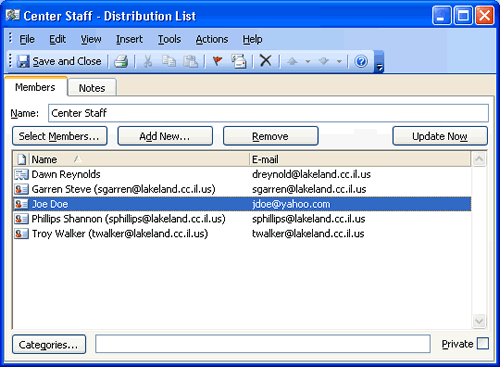
- All persons that you added to the list will display
in the new distribution list.
- If you desire to remove a person from the list,
select the name from the list and Click the
Remove button.
- Click Save and Close when finished.
The new distribution list will appear in your Contact
Folder.
Figure 8
Sending Email to the Distribution List
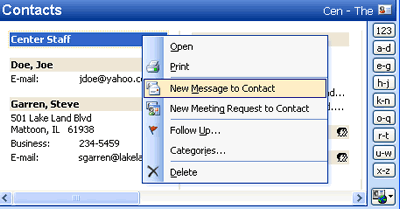
In your personal Contacts Folder, right click over
Distribution List and chose New Message to Contact.
The new message dialog box will appear. Type your message
and click Send when done.
Note: You can
also send a New Meeting Request to the List from the right
click menu.
Figure 9
